Here. We. Go. You’re about to discover a craft that has been practiced by people for so long, that its origins are lost to time. You’re doing something that the culinary deep state doesn’t want you to do and will soon learn for yourself something they DEFINITELY don’t want you to know: you are capable of making ANY food. You’re about to become a wizard in the eyes of your friends, because they’ll have no idea that what you’re serving them is possible, and so the only possible explanation is magic. And the whole time all you’ll be able to think about is the biggest secret of all: it’s EASY. This is what it means to be a Tablesmith, and food is our passion.
The word charcuterie means “cooked meat” in French and that, essentially, is what we will be doing by curing it. The big jump is that when we think of “cooking”, we think about heat and internal temperature, but charcuterie uses enzymes and chemistry to “cook”, make safe and compound flavor, meat at temperatures below the ambient temperature of your home. This is different than what we’re used to, but when done correctly, curing is no less safe than roasting meat in an oven. Without getting too in the weeds, curing uses dehydration the same way baking uses heat. To do this, salt and air-drying are our primary tools.
Choose a project
Dry cured charcuterie is split into two categories: whole muscles and sausages. Whole muscle charcuterie, think prosciutto, is a piece of meat that has been dry cured pretty much as is. Buy a cut from the butcher shop, cure it, hang it, eat it, simple as that. Sausage charcuterie, think salami, is the next level, and involves more variables, which can create a wider range of end products. However, it’s more complicated, finicky, and requires additional specialized equipment like a meat grinder and stuffer. Because we are grinding meat to make sausage, we introduce oxygen to the interior of the piece. This requires us to take an extra safety measure, fermentation, which can be finicky, and you’ll need a tool to monitor pH. Whole muscle charcuterie is a much more approachable option so we will start there.
Technically, any whole muscle can be dry cured, but there are three that are by far the most popular: prosciutto, coppa, and pancetta, all of which are pork. To compare these options, we should consider three factors: cost, duration, and accessibility.
- Prosciutto is made from a whole, skin on, back leg and ham. This is a large cut, around 16 pounds, and usually costs at least $50. Because of its size, prosciutto takes at least six months to finish aging. Getting your hands on one is possible, but you’ll need a good butcher to help you.
- Coppa is a neck muscle, commonly found in a shoulder roast. It weighs about four pounds, costs roughly $16, and hangs for around three months. You can cut one out of a shoulder roast yourself, or ask your butcher for help.
- Pancetta is made from pork belly, which is the same cut that bacon is made from. Pork belly is a big slab, so your butcher will be able to cut a piece of any size. You can get your hands on a one-pound piece for less than $5 and cure it from start to finish in about a month. Finished pancetta is unbelievably good and can be used for tons of stuff. The ease and end result of pancetta is unmatched, which makes it the perfect first project.
Set up your equipment
The two keys to success in dry curing are organization and control, both of which are dependent on your equipment. To stay organized, you’ll need a kitchen scale and some way to track your weights, durations, and label your pieces. The Recipe Log Book that comes with the CELR-12 Ultimate System is templated to keep your information organized and has cut-out tags at the bottom of each page. If you don’t have a journal, you can use blank paper, just be sure to mark very clearly exactly what each number means and corresponds to. As for measuring your weights, any decent kitchen scale that can read small values in grams will work just fine!
The second key to success is control, more specifically, environmental control. For the dry curing process to happen correctly, you need to hang your pieces for relatively long periods of time in an environment with a stable temperature between 55° F and 60° F and humidity between 65% and 75%. Your spot also needs to have constant air circulation, and not be gross. If you’ve ever eaten something that’s been left uncovered in a refrigerator, you know that odors turn to flavors, so your spot needs to be clean. You’ll need an equipment setup that can maintain these conditions for long periods of time.
Maintaining these environmental conditions is what the CELR-12 is designed to do
You’ll also need a way to suspend the piece in your cooler. The CELR-12 US comes with some netting, twine, and rods, this is what that stuff is for! The last thing you need is a plastic bag for the cure stage. A vacuum sealable bag is best, but a zipper bag will also work, you’ll just need to manually squeeze air out.
Collect your ingredients
Everything in dry curing is based on weight ratios, so the amount of each ingredient you need depends on the weight of the cut of meat you’ll be curing. Ingredients can be as simple as meat and salt, or you can create new flavors by pairing washes and rubs before hanging. For our purposes of a first project, let’s keep it simple with just meat and salt.
- Skinless pork belly, about one pound
- Get your hands on the best pork you can. If all you have available is a supermarket, so be it, but if you have access to a butcher shop, they will almost definitely have a better product. The absolute best pork is direct from a farmer or wild, but this is more difficult logistically, as you’d probably have to purchase an entire hog.
- Salt
- Salt is the magic ingredient that turns raw meat into safe to eat, delicious charcuterie. You can use a good sea salt, or kosher salt, but DON’T use iodized salt, rock salt, or curing salt #1 or #2. Curing salts are toxic at certain levels, but are necessary for sausage making in very low quantities, and I don’t use them at all on whole muscles.
Cure stage
- Your belly won’t weigh exactly one pound, so weigh it now (I prefer working in grams). For the purpose of illustration, let’s assume a weight of 500 g.
- Measure out a 5% ratio of salt to meat, in this case, we would need 25 g. However, opinions on the exact ratio vary, and I encourage you to look into some alternatives. The two authors who I first discovered the craft through are Brian Polcyn and Steven Lamb, and you should check out some of their work.
- Next, thoroughly rub the belly with the salt, making sure to cover every single exposed surface. I recommend doing this over a pan or bowl, so you don’t lose any salt.
- Place the belly and any salt that didn’t stick into your plastic bag. Make sure the salt is distributed as evenly as possible within the bag, around the meat.
- Squeeze as much air out of the bag as you can, and seal it.
- Place the bag with the meat into your cooler or refrigerator (below 38° F) and place a weight on top, a can or jar on a plate will work.
- Let the meat cure for 24 hours per pound, turning over around the halfway point.
Hang stage
- Once the cure stage is finished, grab the bag and remove the meat. If you cured using the CELR-12, you can go ahead and change its setting to your hanging temperature, between 55° F and 60° F.
- Thoroughly rinse the meat with water until every bit of the salt is gone, then pat it dry. Reweigh the belly, the cure will have reduced its weight some through water loss. For illustration purposes, let’s assume it now weighs 480 g. To determine doneness, we will monitor the belly’s weight to measure moisture loss. We want to reduce the post cure weight (PCW) by 30%, so in this case we will be looking for a weight of 336 g.
- If you want to rub the meat with spices or aromatics, now would be the time to do so. Be careful not to introduce any salt here (most store-bought rubs have salt in them).
- Depending on the shape of your belly, the best way to hang it may vary. Generally, I like to get a rectangular piece of belly, in which case poking a hole in the top edge and tying some twine through in a loop seems to work best.
- Attach a tag to the belly that has your post cure weight (480 g) and target weight (336 g) clearly marked.
- Hang the belly in your cooler and let the magic happen!
- You’ll need to weigh the belly to check and see if it has reduced to the target weight (336 g) and is done. You can do this as often as you’d like, but generally I try to handle pieces as little as possible.
Serve
Time for the payoff! You’ve now created something most people don’t know is possible. You hold in your hands a piece of meat that has magically transformed into a delicacy that you’d otherwise pay an arm and a leg for! And, if you came up with a unique spice rub and wash, you’re about to experience flavors that no person has ever tasted before.
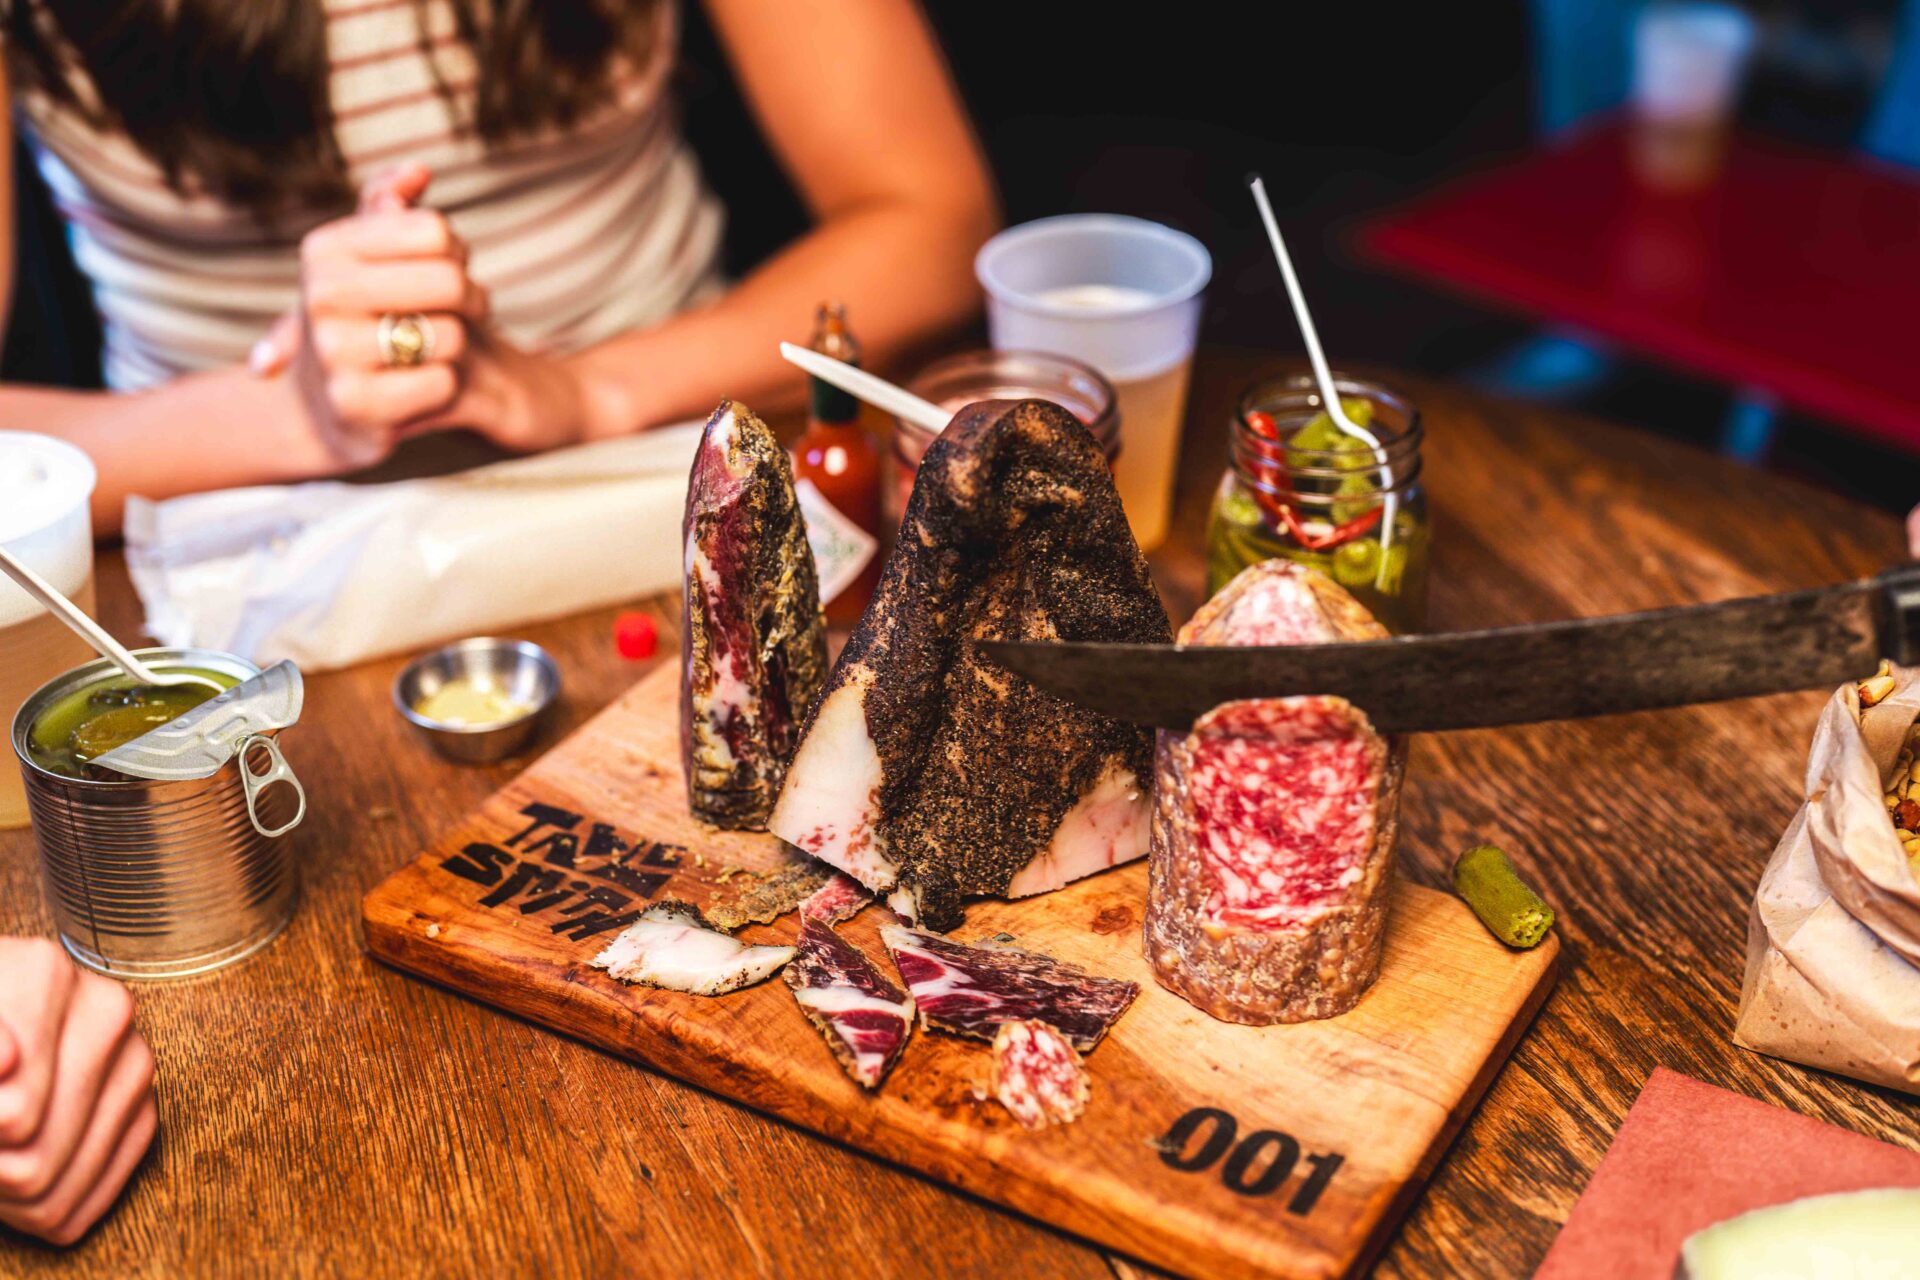
Every bit of the pancetta is edible now, as is. However, I like to slice about ¼” of the edge off, across the grain. This piece will be a bit harder than the rest, and is similar to the crust of bread. I like to use the “crust” pieces to cook with, adding these pieces to vegetables or soups will turn them up to eleven.
As for serving the rest, slice as thinly as possible, across the grain. If you’ve got a party coming up, use the serving board that comes with the CELR-12 US to serve the piece whole, I guarantee it will be an absolute hit!